Intro to Cave Class

This course covers the basis principles of actual cave diving and follows the cavern diver course. This course develops the minimum skills and knowledge required for limited penetration cave diving. This is the second step in development of safe cave diving. This course is aimed at perfecting basic skills and mastering the techniques and procedures required for the most elementary of cave diving. Cave dives are planned around very limited penetrations so the diver may progress into cave diving at a conservative pace. Intro to Cave Diving is not intended to train divers for all facets of cave diving.

Cost: $450

Limits:
Penetrations are limited to one-third (1/3) of a single tank or one sixth (1/6) of doubles, Simple linear penetrations, no complex navigation or dive plans, 130 feet maximum depth, 30 feet starting visibility, no restrictions, no decompression dives and no exploration or goal setting dives.

Prerequisites:
NSS-CDS, NACD, TDI, PADI, or IANTD Cavern Diver Certification.

Duration:
3-days, 1- classroom; 4-dives, at least 90 minutes of bottom time.


Limits:
Penetrations are limited to one-third (1/3) of a single tank or one sixth (1/6) of doubles, Simple linear penetrations, no complex navigation or dive plans, 130 feet maximum depth, 30 feet starting visibility, no restrictions, no decompression dives and no exploration or goal setting dives.

Gear:

  • Two first and second stage regulators with SPG for configured for sidemount
  • One with a seven to nine foot hose for air sharing
  • Approved sidemount harness (dual bladder or dual wings unless drysuit diving)
  • Mask and fins (no snorkel, no split fins)
  • Primary light with appropriate handle
  • Two battery powered lights one of which can not be rechargeable
  • Safety spool or reel (~150ft)
  • Dive computer (single or multi-gas), and either back-up computer or timer & depth gauge
  • Cutting tool such as a line cutter (a leg mounted dive knife is not acceptable)
  • Exposure protection (dry suit use requires prior dry suit diving experience)
  • Weight system (if needed)
  • Two primary cylinders at least 72cuft
  • Directional line arrows(at least 3)

Dates:
Please call or e-mail for next available class

Cavern Class

The cavern diver course will develop the minimum skills and knowledge for cavern diving. Planning, environment, procedures, techniques, problem solving and other specialized needs of cavern diving are covered. Problem solving in cavern diving includes, but is not limited to: body positioning (trim), buoyancy control, emergency procedures, line following, and propulsion techniques. Special emphasis is placed on the unique environment including silting, entanglement, disorientation and equipment modifications. The cavern diver course is in no way intended to provide instruction for cave diving. There are additional courses required for cave diving.

Cost: $400

Prerequisite:

  • Advanced Open Water Diver or equivalent.
  • Students should be able to demonstrate comfort and competency in open water skills to the instructor’s satisfaction

Duration:
This course will last a minimum of three days. There is one classroom presentation, land line drills, and four dives minimum. Three dives will be in a cavern and one open water dive with a minimum of 90 minutes of bottom time.


Limits:
The issuing of the cavern certification authorizes a person to dive in the daylight in caverns. This includes 130 feet maximum depth. No decompression diving and no restrictions.

Gear:

  • Two first and second stage regulators with SPG for configured for sidemount
  • One with a seven to nine foot hose for air sharing
  • Approved sidemount harness (dual bladder or dual wings unless drysuit diving)
  • Mask and fins (no snorkel, no split fins)
  • Two battery powered lights one of which can not be rechargeable
  • Safety spool or reel (~150ft)
  • Dive computer (single or multi-gas), and either back-up computer or timer & depth gauge
  • Cutting tool such as a line cutter (a leg mounted dive knife is not acceptable)
  • Exposure protection (dry suit use requires prior dry suit diving experience)
  • Weight system (if needed)
  • Two primary cylinders at least 72cuft

Dates:
Please call or e-mail for next available class

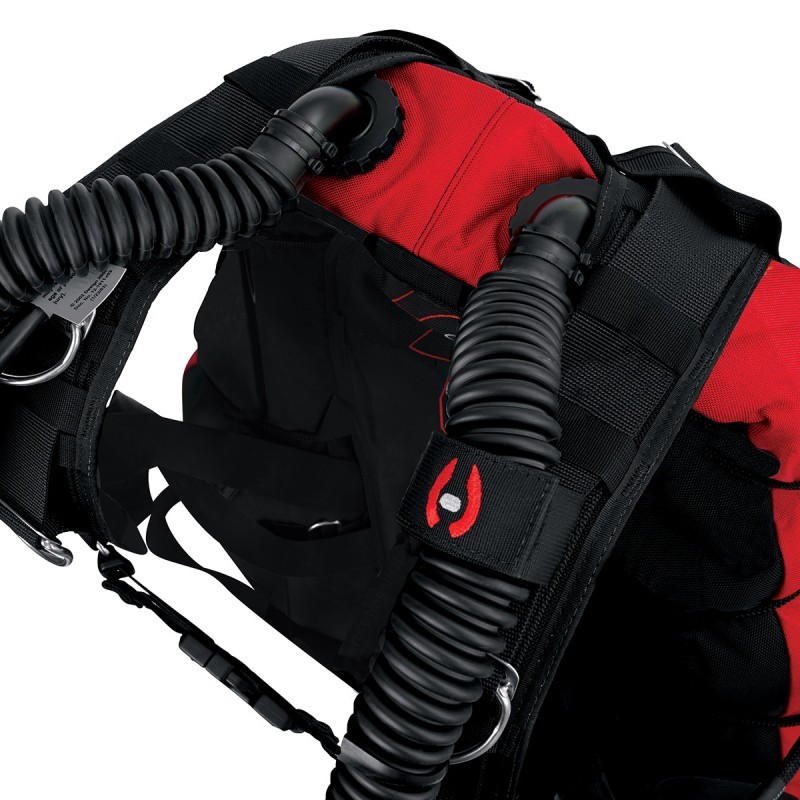
Dual Bladder BCD

Do I need a dual bladder BCD?

ht_sms100_top1b

Redundancy

Redundancy is a core requirement for doing technical diving.  “3 is 2, 2 is 1, 1 is none.”  If a single source of buoyancy control fails and the diver is negatively buoyant – as is typical when executing decompression dives with stage or deco cylinders – the diver may be too negative to return to the surface – resulting in drowning.

BCD Failure

How might a BCD fail?

  • Corrugated Hose failure
  • BCD Dump Valve unscrews or fails open.
  • Seam failure
  • Abrasion or cut to the wing

(I’ve personally witnessed each of these events at least once.)

PADI Standards

As a consequence, we need a redundant buoyancy control device available – and not a lift bag or dSMB.  A drysuit or dual bladder BCD is generally the recommended solution to this requirement.  However, PADI Tec Deep standards require that students use a dual bladder BCD except in the case where lightweight cylinders are being used – in which case a drysuit may be used for backup buoyancy.

The definition of lightweight cylinders in not defined – and as such subject to interpretation.  On one end – Aluminum 80’s would certainly be considered lightweight and permit the usage of a drysuit as backup buoyancy under standards.  On the other end, my Steel LP 108 Faber cylinders would certainly not fit the definition of “lightweight cylinders.”  (Faber 85’s?   Use your own judgement.)

Real World Drills

I’ve executed failed BCD drills – even with my LP108 Steel Cylinders and two deco bottles – and yes – it is possible to use a drysuit under these circumstances.  However, I will note that during this exercise:

  • my drysuit is heavily inflated with the dump completely closed
  • I must maintain a horizontal position or the neck seal will burp causing me to loose buoyancy
  • there is considerable task loading reducing my ability to respond effectively to any additional problems of my own or my team
  • not every drysuit will have sufficient buoyancy capacity

Recommendations

Unless your technical diving always involves a drysuit with lightweight cylinders (Al80’s)  – I recommend using a dual bladder BCD.

And, if you DO decide to use your drysuit as a backup BCD – make sure you drill sufficiently to ensure that you can effectively use the drysuit to safely complete your dive.

Regulator Seminar

Hi Equipment enthusiasts!

I’m proposing a regulator seminar for divers with an interest in getting the most out of their equipment.

Please note:  This is not a PADI certification class.  You will not receive a C-Card for attending.  Also, this a not a manufacturer’s regulator repair class.  It will not qualify you to overhaul your first or second stage.

This seminar will focus on theory and practical skills that will enhance your understanding of your regulator, its use, and typical repairs that are within the skill of any diver.

There is some overlap of the content of this seminar with the PADI Equipment Specialist class – so your participation at this seminar may be credited towards satisfying some of the requirements of a PADI Equipment Specialist.


Regulator Seminar:

  • Brief History of Regulators (10 minutes)
  • Overview of Regulator Function (10 minutes)
  • Focus on First Stages (90 minutes)
    • First Stage Function:  How to create Stable IP (Intermediate Pressure)
    • Pressure compensation of IP
    • Piston versus Environmentally Sealed Diaphragm
      • Design and Operation
      • Functional Differences
      • Advantages and Disadvantages
    • Unbalanced, Balanced, Overbalanced
    • DIN versus Yoke
    • Other Features:  Ports: HP, LP, High Flow LP, Turrets, Swivels
    • Disassembly to Illustrate Function
      • Scubapro Mark 2 (Unbalanced, Piston 1st Stage)
      • Scubapro Mk17 (Overbalanced, Diaphragm 1st Stage) or Hollis DC1
    • Student Exercise:  Measuring IP with an IP gauge and what it tells us about our first stage’s health.
  • Focus on Second Stages (90 minutes)
    • Second Stage Function:  Ambient pressure from Stable IP
    • Balanced versus Unbalanced
    • Venturi Assist (Dive / Predive)
    • Cracking Pressure Adjustment
    • Disassembly to Illustrate Function
      • Scubapro R195 (Unbalanced 2nd Stage)
      • Scubapro G260 (Balanced 2nd Stage)
    • Student Exercise:  Measuring Cracking Pressure on a Magnahelic.
  • Service Technicians Role:  (Frequency of Service, Tools, Training, Process, Liability)  (10 minutes)
  • Hands on Clinic on appropriate Regulator Repairs:  (30 minutes)
    • Discuss limitations and liability for people NOT trained by the manufacturer for service
    • Student Exercise:  Proper care and storage.  Rinsing of regulator, inspection of fittings under strain reliefs
    • Student Exercise: Diagnosing Leaks (HP / LP Hose, Plug, Spool, o-ring, etc.)
    • Student Exercise: Appropriate Tools, Lubricants, techniques.
    • Student Exercise: Installing Accessories (Hose, Plug, Spool, SPG, Computer Transmitter, 2nd Stage)
    • Student Exercise: Inspecting / Installing a mouthpiece

I’m freeflowing – how do I share air? And 4 more questions that should be answered BEFORE the dive begins…

I recently overheard a diver say,

I had a free-flow – and I didn’t know how to share air…

There could be several reasons why this happened…

  • Their dive buddy may have had a different regulator configuration, for example a combination Octo/Inflator like the AIR2 system by Scubapro.
  • Their buddy has a different style BCD (e.g. side-mount, DIR style Back Plate and Wing (BPW) with a long hose and bungied backup, or traditional doubles configuration – again with a long hose and a redundant bungied backup regulator)
  • Their buddy has placed their alternate air in a non-standard (inappropriate) location (e.g. in a pocket) or it has become un-clipped and is dangling out of sight.

The ideal time to sort out these differences in configuration is BEFORE the dive – during a pre-dive safety check.  It is a basic skill that is often skipped as one becomes more complacent about their diving.  But – much like it’s technical cousin the S-Drill – doing your predive safety check before each dive could make the difference between an unfavorable ending – and a minor inconvenience.

PADI introduces the Pre-Dive Safety Check in Open Water class with the acronym BWRAF.

B-ruce W-illis, Ruins, A-ll, F-ilms

W-hite, B-unny, R-abbits, A-re, F-luffy.

Breaking this down.  B stands for Buoyancy Control Dive (BCD).  Do I understand how my Buddy’s BCD operates.  Is the power-inflator attached to the left shoulder – or is it in an odd location (my Hollis SMS 100 has the power inflator mounted at the bottom of the left side.)  Do I know where the dumps are (my Hollis is on my left shoulder.)  If I need to assist my buddy – perhaps during an emergency – I don’t want to be fumbling around with a BCD I don’t understand.  Some open water divers may have never seen anything other than a Jacket style BCD.  Don’t assume understanding.  If we are going to safely dive together – we should have an understanding of each other’s gear.  Take the time during a Pre-Dive Safety Check to explain anything interesting or unusual about your gear.  You might spark an interest in that style of diving when you do!

R is for releases.  Does my buddy’s BCD have quick releases?  Are any releases, the cam strap for instance, properly closed.  This is a great time to check – before you are in the water.

W is for weights.  Are there integrated weights?  Do I understand how the releases work?  Did we remember to add our proper weight?  Better to know now.

Air is represented by A.  I want to make sure that a breathing gas will be available for the entire dive – for both the diver and his buddy.  Start by making sure the air is ALL THE WAY ON.  No quarter turn back needed.  Then breath the regulator a bit while watching the SPG.  The SPG needle should not move.  Do I have sufficient gas for the dive we are planning?  Check the pressure on the SPG to be sure.  This is also a great time to talk about alternate air sharing procedures for a diver with a long hose and bungied backup – as many sidemount, technical and DIR practitioners may utilize.  In those cases, the out of air (OOA) diver must signal his situation with a slash across the throat – and the donating diver will provide the appropriate regulator for the OOA diver.  This may involve the donating diver switching to a backup regulator or breathing on their Air2.  Let’s have this understanding before we are OOA – OK?

F is the final check.  How many times have we seen divers enter the water without fins, mask, computer, drysuit zipped up, etc.  Let’s take moment to go ever everything and make sure we are all buttoned down and ready to dive!

The Pre-Dive Safety Check is not a difficult skill.  As an instructor, I require my students to do it with their buddies.  I also do it with them to ensure that they are comfortable and safe diving with me when I am in one of several configurations that they may not be familiar with:  side-mount, back-mounted doubles, etc.

Scuba is awesome in that it allows for so much individual expression in gear configuration and styles of diving.  But with that liberty comes the responsibility to be familiar with our dive buddy’s configuration – or at least the elements of it that will impact our safety.    Let’s not get complacent and forget to do our Pre-Dive Safety Check!